Air Fryer Cheesy Garlic Bread
If you’re looking for a quick and delightful side dish that brings everyone together, then this Air Fryer Cheesy Garlic Bread is just the ticket! Imagine biting into a piece of crispy bread topped with gooey cheese and a burst of garlic flavor—it’s pure comfort in every slice. This recipe has become a family favorite in our home, perfect for busy weeknights or when we have friends over for a cozy gathering.
What I love most about this cheesy garlic bread is how effortlessly it comes together. With just a few simple ingredients, you can whip up this crowd-pleaser in under 15 minutes! Trust me, once you try this recipe, you’ll want to make it again and again.
Why You’ll Love This Recipe
- Quick to make: Ready in just 12 minutes, this recipe is perfect for those evenings when time is short.
- Family-friendly: Kids and adults alike will devour this cheesy treat. It’s hard to resist!
- Simple ingredients: Made with pantry staples, you probably already have what you need at home.
- Customizable: Feel free to add your own twist with different cheeses or herbs.
- Perfect for sharing: Great as an appetizer or side dish for any meal!

Ingredients You’ll Need
You’ll find that the ingredients for this Air Fryer Cheesy Garlic Bread are simple and wholesome. No fancy items here—just good old-fashioned goodness that brings warmth to your kitchen!
For the Garlic Spread
- 1/2 cup Butter (softened)
- 4 cloves Garlic (minced)
- 1 tsp Dried Parsley
- 1/4 tsp Salt
For the Bread
- 1 loaf French Bread (or Italian bread, about 12 inches long)
- 1 cup Shredded Mozzarella Cheese
- 1/4 cup Grated Parmesan Cheese
Variations
One of the best things about this cheesy garlic bread recipe is its flexibility! You can easily mix things up based on what you have on hand or what flavors you love.
- Add some heat: Sprinkle red pepper flakes on top before air frying for a spicy kick.
- Herb it up: Mix in fresh herbs like basil or oregano with the garlic spread for extra flavor.
- Make it meaty: Add cooked chicken or turkey slices on top of the cheese before air frying.
- Experiment with cheeses: Try using pepper jack or feta cheese for a different taste profile.
How to Make Air Fryer Cheesy Garlic Bread
Step 1: Prepare the Garlic Spread
Start by mixing softened butter with minced garlic, dried parsley, and salt in a bowl. This mixture is crucial because it infuses the bread with garlicky goodness. Use a fork to blend everything well until it’s smooth and creamy. This will ensure each bite has that rich flavor we all love!
Step 2: Slice the Bread
Cut your loaf of French or Italian bread in half lengthwise. This step is important because it allows all that delicious garlic butter to soak into the bread and makes it easier to load up with cheese later!
Step 3: Spread the Mixture
Generously spread the garlic butter mixture over each half of the bread. Make sure to cover all edges so every bite is filled with flavor. The butter not only adds taste but also helps achieve that delightful crispiness when air-fried.
Step 4: Add Cheese
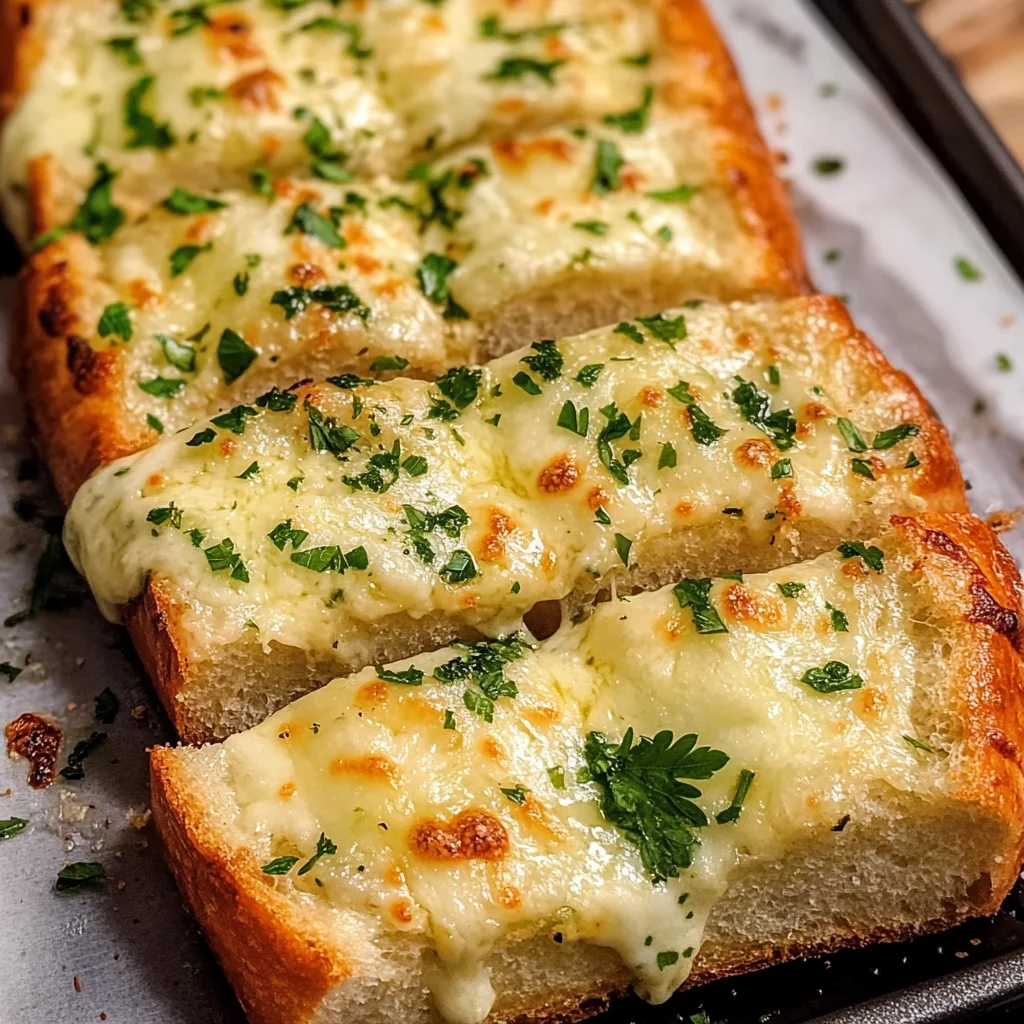
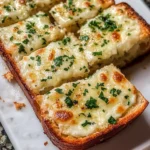
Sprinkle shredded mozzarella cheese evenly over both halves, followed by grated Parmesan cheese. The combination will melt beautifully, creating that gooey texture we crave in cheesy garlic bread. Don’t be shy—load it up!
Step 5: Air Fry
Place the prepared halves into your air fryer basket and cook at 370°F for about 6-8 minutes, or until golden brown and bubbly. Keep an eye on them towards the end so they don’t burn; we want that perfect crunch without losing any deliciousness!
Step 6: Serve and Enjoy!
Once done, carefully remove your cheesy garlic bread from the air fryer and let it cool slightly before slicing into pieces. Serve warm as an appetizer or alongside your favorite pasta dish. Get ready for compliments because everyone will be asking for more!
Pro Tips for Making Air Fryer Cheesy Garlic Bread
Making cheesy garlic bread in the air fryer is a breeze, but a few helpful tips can make your final product even better!
-
Use Softened Butter: This ensures that the butter mixes easily with garlic and herbs, allowing for an even distribution of flavor across your bread.
-
Don’t Skimp on Garlic: For that bold garlicky taste, feel free to add more minced garlic than the recipe calls for. More garlic means more flavor!
-
Preheat Your Air Fryer: Just like an oven, preheating your air fryer helps achieve that perfect crispy texture on the outside while keeping the inside soft.
-
Experiment with Cheese Blends: While mozzarella and Parmesan are fantastic, mixing in other cheeses like cheddar or provolone can add a delightful twist to your cheesy garlic bread.
-
Keep an Eye on Cooking Time: Air fryers can vary in performance; stay close to check if your bread is golden and crispy to avoid overcooking.
How to Serve Air Fryer Cheesy Garlic Bread
Serving cheesy garlic bread can be as fun as making it! Here are some creative ideas to make your dish shine at mealtime.
Garnishes
- Fresh Parsley: A sprinkle of finely chopped parsley adds a pop of color and freshness that complements the rich flavors beautifully.
- Chili Flakes: If you enjoy a bit of heat, a dash of chili flakes can elevate your cheesy garlic bread with a spicy kick.
Side Dishes
- Mixed Green Salad: A refreshing salad with mixed greens, cherry tomatoes, and a light vinaigrette balances out the richness of the cheesy garlic bread.
- Tomato Soup: This classic pairing creates a cozy meal. The tanginess of tomato soup complements the cheesiness perfectly.
- Grilled Vegetables: Roasted or grilled veggies like zucchini, bell peppers, and eggplant add nutritional value and vibrant colors to your plate.
- Pasta Primavera: A light pasta dish loaded with seasonal vegetables makes for an excellent partner to this garlicky delight.
With these tips and serving suggestions, you’re sure to impress family and friends with your delectable air fryer cheesy garlic bread! Enjoy every bite!
Make Ahead and Storage
This air fryer cheesy garlic bread is not only quick to whip up, but it’s also perfect for meal prep! You can easily make extra and enjoy it throughout the week. Here’s how to store, freeze, and reheat your delicious cheesy garlic bread.
Storing Leftovers
- Allow the leftover garlic bread to cool completely.
- Wrap individual slices in plastic wrap or aluminum foil.
- Place wrapped slices in an airtight container or a resealable bag.
- Store in the refrigerator for up to 3 days.
Freezing
- Follow the same steps as above, making sure the bread is completely cooled.
- For best results, place slices between layers of parchment paper before wrapping.
- Store in a freezer-safe bag or container for up to 3 months.
Reheating
- Preheat your air fryer to 350°F (175°C).
- Place the garlic bread slices in the basket in a single layer.
- Heat for about 3-5 minutes, or until warmed through and crispy.
FAQs
Have questions about making this scrumptious air fryer cheesy garlic bread? Here are some common inquiries!
How do I make Air Fryer Cheesy Garlic Bread from scratch?
Making your own air fryer cheesy garlic bread is simple! You just need softened butter, minced garlic, herbs, and cheese spread on your favorite bread. Then, pop it into the air fryer until golden and bubbly!
Can I use different types of cheese for Air Fryer Cheesy Garlic Bread?
Absolutely! While mozzarella is classic, feel free to experiment with other cheeses like cheddar or gouda. Just keep the proportions similar for that gooey texture!
How long does Air Fryer Cheesy Garlic Bread last?
When stored properly in the refrigerator, air fryer cheesy garlic bread can last up to 3 days. If you freeze it, it will stay good for about 3 months.
What can I serve with Air Fryer Cheesy Garlic Bread?
This delightful cheesy bread pairs beautifully with pasta dishes, salads, or soups. Try serving it alongside your favorite marinara sauce for dipping!
Final Thoughts
I hope you find joy in making this air fryer cheesy garlic bread! It’s not just a side dish; it’s a warm hug of flavor that brings comfort to any meal. Enjoy every gooey bite and share it with loved ones—there’s nothing better than homemade goodness! Happy cooking!
Air Fryer Cheesy Garlic Bread
Air Fryer Cheesy Garlic Bread is the ultimate comfort food, combining a crispy exterior with a gooey, cheesy interior that’s bursting with garlic flavor. Perfect as a side dish or a snack, this easy recipe takes just minutes to prepare and cook, making it ideal for busy weeknights or gatherings with friends. With simple ingredients you likely already have in your pantry, you can whip up this crowd-pleaser in no time. Whether served alongside pasta or enjoyed on its own, each bite offers a delightful blend of buttery goodness and cheesy satisfaction. Get ready to enjoy the compliments!
- Prep Time: 5 minutes
- Cook Time: 8 minutes
- Total Time: 13 minutes
- Yield: Serves about 4 slices 1x
- Category: Appetizer
- Method: Frying
- Cuisine: American
Ingredients
- 1/2 cup softened butter
- 4 cloves minced garlic
- 1 tsp dried parsley
- 1/4 tsp salt
- 1 loaf French or Italian bread
- 1 cup shredded mozzarella cheese
- 1/4 cup grated Parmesan cheese
Instructions
- In a bowl, mix softened butter, minced garlic, dried parsley, and salt until smooth.
- Slice the loaf of bread in half lengthwise.
- Spread the garlic butter mixture evenly over both halves.
- Sprinkle shredded mozzarella and Parmesan cheeses over the bread.
- Place the halves in an air fryer and set to 370°F for 6-8 minutes until golden brown and bubbly.
- Remove from the air fryer, let cool slightly, slice, and serve warm.
Nutrition
- Serving Size: 1 slice (50g)
- Calories: 200
- Sugar: 0g
- Sodium: 350mg
- Fat: 13g
- Saturated Fat: 8g
- Unsaturated Fat: 3g
- Trans Fat: 0g
- Carbohydrates: 18g
- Fiber: 1g
- Protein: 6g
- Cholesterol: 30mg