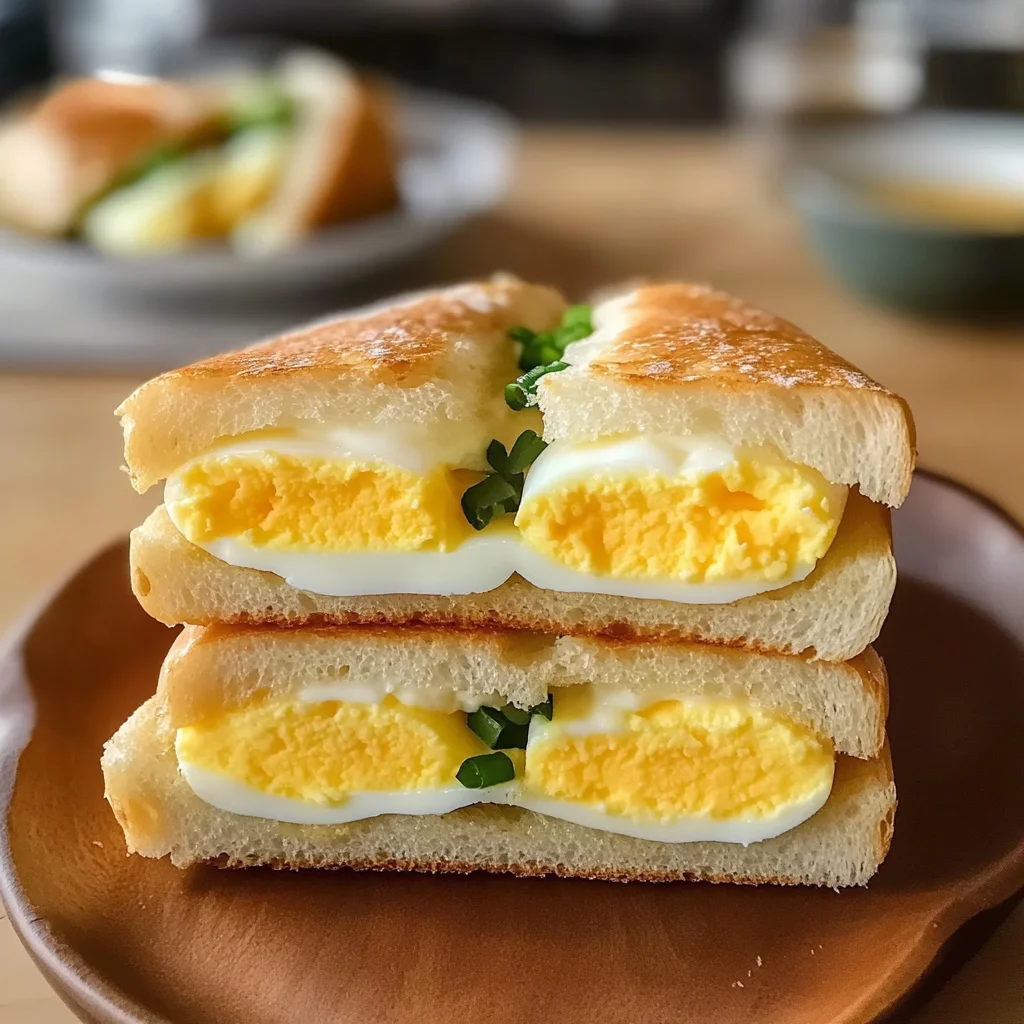
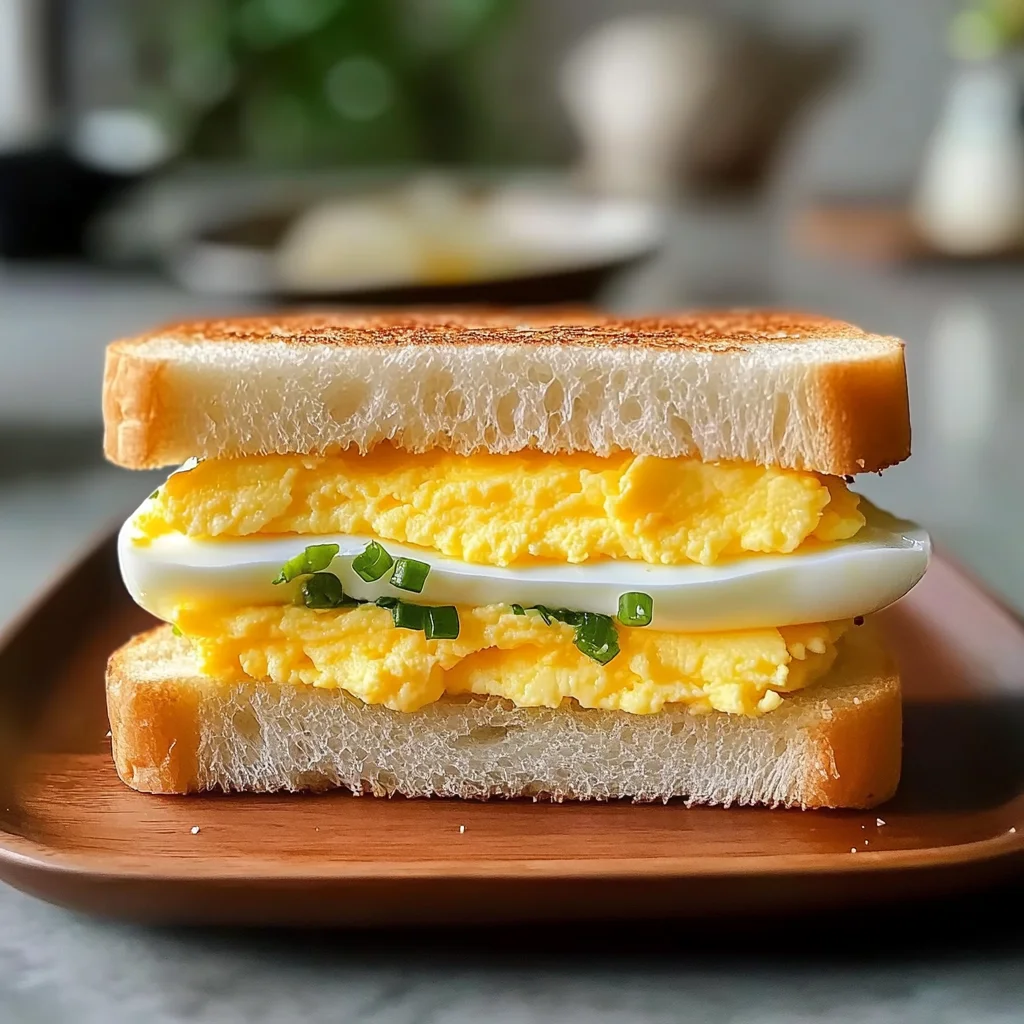
Japanese Egg Sandwich (Tamago Sando)
If you’re looking for a delightful and comforting snack, the Japanese Egg Sandwich (Tamago Sando) is a perfect choice. This sandwich brings a taste of Japan right to your kitchen with its creamy, savory egg filling nestled between soft slices of fluffy milk bread. It’s not just a meal; it’s an experience that can brighten up busy weeknights or be a star at family gatherings.
What I love most about this recipe is how simple yet satisfying it is. Whether you’re in need of a quick lunch or want to impress guests, Tamago Sando always hits the spot. Plus, it’s incredibly easy to make, and I promise you’ll enjoy every bite!
Why You’ll Love This Recipe
- Quick to make: This Japanese Egg Sandwich comes together in just 35 minutes, making it perfect for busy days.
- Family-friendly: Kids and adults alike will adore the creamy egg filling and soft bread.
- Make-ahead option: Prepare the filling ahead of time and assemble sandwiches when you’re ready to eat!
- Deliciously unique flavor: The combination of Japanese mayonnaise and Dijon mustard gives this sandwich an irresistible taste.
- Versatile: Great for breakfast, lunch, or even as a fun snack during movie night.
Ingredients You’ll Need
You won’t need much for this delicious treat! The ingredients are simple and wholesome, making it easy for anyone to whip up this delightful Japanese Egg Sandwich (Tamago Sando).
- 4 Large Eggs
- 3 tbsp Japanese Mayonnaise (Kewpie brand preferred)
- 1 tsp Dijon Mustard
- 1 tsp Granulated Sugar
- 1/4 tsp Salt
- 1/8 tsp Black Pepper
- 4 slices Japanese Milk Bread (Shokupan) (Crusts removed)
- 1 tbsp Unsalted Butter (Softened)
Variations
The beauty of the Japanese Egg Sandwich (Tamago Sando) lies in its flexibility! Feel free to get creative with these variations:
- Add some crunch: Toss in thinly sliced cucumbers for a refreshing crunch.
- Herb infusion: Mix in some chopped chives or parsley into the egg filling for added flavor.
- Spice it up: If you like heat, add a dash of sriracha or chili powder to the egg mixture.
- Switch up the bread: Try using whole grain or gluten-free bread if you prefer something different!
How to Make Japanese Egg Sandwich (Tamago Sando)
Step 1: Boil the Eggs
Start by bringing a pot of water to a gentle boil. Carefully add the eggs and let them cook for about 10 minutes. This will give you perfectly hard-boiled eggs. Once done, transfer them to an ice bath to stop cooking and cool down quickly.
Step 2: Prepare the Filling
Once your eggs have cooled, peel them gently. In a mixing bowl, mash the eggs with a fork until they are crumbly but not pureed. Add in the Japanese mayonnaise, Dijon mustard, sugar, salt, and black pepper. Mix everything well until it forms a creamy filling. This blend creates that signature richness we all love!
Step 3: Assemble the Sandwiches
Spread softened butter on one side of each slice of milk bread. Take half of your egg filling and spread it evenly on one slice of bread. Top with another slice of bread, butter side down. Repeat with the remaining ingredients. Press down gently so everything sticks together.
Step 4: Slice and Serve
Trim off the crusts if desired for that authentic look! Cut each sandwich diagonally or into halves for easy eating. Serve immediately to enjoy that fresh flavor!
And there you have it—a delicious homemade Japanese Egg Sandwich (Tamago Sando) that’s sure to become a favorite in your household!
Pro Tips for Making Japanese Egg Sandwich (Tamago Sando)
Creating a perfect Tamago Sando at home can be a delightful experience with these helpful tips!
-
Use fresh eggs: Fresh eggs yield a creamier filling and enhance the flavor of your sandwich. The fresher the eggs, the fluffier your filling will be!
-
Mash well: When mixing the egg filling, ensure you mash the eggs thoroughly to achieve a smooth and creamy texture. This helps in evenly distributing the mayonnaise and Dijon mustard, resulting in every bite being delicious.
-
Chill before assembling: Allow the egg mixture to chill in the fridge for about 15 minutes before spreading it onto the bread. Chilling helps the flavors meld together beautifully while making it easier to spread.
-
Choose high-quality mayonnaise: Using Japanese mayonnaise, like Kewpie, adds a rich umami flavor that elevates your sandwich to new heights. It’s creamier and has a slight sweetness compared to regular mayonnaise.
-
Cut with care: When slicing your sandwiches, use a sharp knife to ensure clean edges. This not only makes them look more appealing but also prevents squishing the soft bread.
How to Serve Japanese Egg Sandwich (Tamago Sando)
Presenting your Tamago Sando beautifully can make it even more enjoyable! Here are some ideas on how to serve this delightful dish.
Garnishes
- Fresh herbs: A sprinkle of chopped chives or parsley adds a pop of color and freshness.
- Sesame seeds: Toasted sesame seeds provide a nutty crunch that complements the creamy filling nicely.
- Sliced cucumbers: Thin cucumber slices can add a refreshing crunch and look appealing when served alongside.
Side Dishes
- Miso soup: This traditional Japanese soup made from fermented soybean paste provides a warm complement to your sandwich, enhancing the overall meal experience.
- Pickled vegetables: A small serving of pickled daikon or cucumber adds tanginess that pairs perfectly with the richness of the egg sandwich.
- Fruit salad: A light fruit salad featuring seasonal fruits like melon or strawberries offers a refreshing contrast to the savory flavors.
- Green tea: A cup of freshly brewed green tea serves as an excellent beverage choice that complements both flavor and health benefits.
By incorporating these serving suggestions and pro tips, your Japanese Egg Sandwich (Tamago Sando) will not only taste amazing but also look beautiful on any table. Enjoy this delightful treat!
Make Ahead and Storage
This Japanese Egg Sandwich (Tamago Sando) is not only delicious but also perfect for meal prep! You can make the egg filling in advance, making it easy to whip up a quick lunch or snack whenever hunger strikes.
Storing Leftovers
- Store any leftover sandwiches in an airtight container in the refrigerator.
- Consume within 2 days for the best taste and texture.
- If separating the filling and bread, store them individually to maintain freshness.
Freezing
- You can freeze the egg filling for up to one month.
- Use a freezer-safe container or resealable bag, ensuring as much air as possible is removed.
- Thaw the filling overnight in the refrigerator before assembling your sandwich.
Reheating
- If you prefer warm sandwiches, gently reheat the egg filling in a microwave at medium power for about 30 seconds, or until warmed through.
- Assemble your sandwich just before serving to keep the bread soft and inviting.
FAQs
Here are some common questions about making a Japanese Egg Sandwich (Tamago Sando).
Can I use regular mayonnaise instead of Japanese mayonnaise for Tamago Sando?
While you can substitute regular mayonnaise in a pinch, using Japanese mayonnaise gives a richer flavor and creamier texture that is characteristic of Tamago Sando.
What bread is best for making Japanese Egg Sandwich (Tamago Sando)?
The ideal choice is soft, fluffy Japanese milk bread (Shokupan), which enhances the overall taste and experience of this delightful sandwich.
How do I customize my Japanese Egg Sandwich (Tamago Sando)?
Feel free to add diced vegetables like cucumbers or even avocado for extra flavor and nutrition. Just be sure they complement the creamy egg filling!
Can I make Japanese Egg Sandwich (Tamago Sando) without sugar?
Yes, you can omit sugar from the recipe if you prefer. The Dijon mustard will still provide a lovely tanginess that balances well with the eggs and mayonnaise.
Final Thoughts
I hope this Japanese Egg Sandwich (Tamago Sando) recipe inspires you to bring a little taste of Japan into your kitchen! It’s simple yet packed with flavor, making it an excellent addition to your meal rotation. Enjoy making this delightful sandwich with your loved ones, and don’t hesitate to get creative with your fillings! Happy cooking!
Japanese Egg Sandwich (Tamago Sando)

Experience the delightful taste of Japan with this creamy Japanese Egg Sandwich (Tamago Sando). Perfect for a quick lunch or as a satisfying snack, this sandwich features a rich egg filling made with fresh ingredients nestled between soft, fluffy slices of milk bread. With its simple preparation and deliciously unique flavor profile, it’s an ideal choice for family gatherings or busy weeknights alike. Whether you enjoy it as is or add your favorite crunch or herb infusion, this Tamago Sando will surely impress with every bite.
- Prep Time: 15 minutes
- Cook Time: 10 minutes
- Total Time: 25 minutes
- Yield: Serves 2
- Category: Snack
- Method: Boiling
- Cuisine: Japanese
Ingredients
- 4 large eggs
- 3 tbsp Japanese mayonnaise (preferably Kewpie)
- 1 tsp Dijon mustard
- 1 tsp granulated sugar
- 1/4 tsp salt
- 1/8 tsp black pepper
- 4 slices Japanese milk bread (Shokupan), crusts removed
- 1 tbsp unsalted butter (softened)
Instructions
- Boil the eggs in a pot of water for about 10 minutes. Transfer to an ice bath to cool.
- Once cooled, peel the eggs and mash them in a bowl. Mix in mayonnaise, Dijon mustard, sugar, salt, and pepper until creamy.
- Spread softened butter on one side of each slice of bread. Layer half of the egg filling on one slice and top with another slice, butter side down. Repeat with remaining ingredients.
- Trim crusts if desired and cut sandwiches diagonally before serving.
Nutrition
- Serving Size: 1 sandwich (150g)
- Calories: 320
- Sugar: 2g
- Sodium: 450mg
- Fat: 20g
- Saturated Fat: 5g
- Unsaturated Fat: 15g
- Trans Fat: 0g
- Carbohydrates: 28g
- Fiber: 2g
- Protein: 11g
- Cholesterol: 370mg